As a follow up to Boosting Your Cybersecurity Infrastructure at Home, where I outline purchasing your own modem and router and returning the equipment you were renting back to your ISP, the next logical step is to actually set-up and access your router. In this blog I will take you through connecting to your router, run through the initial set up, explain a lot of the features along the way, and cover some of the options that will help to secure your home network.
Connecting to Your Router
The first thing you must do is verify that your router is powered on. Then, use an ethernet cable that was described in Part 1 of this guide to connect your computer to your router. After you have physically connected your device, it's time to access the software located on the router. To do this you must open a web browser on your device. Web browsers are applications like Internet Explorer, Chrome, Firefox, etc. In your web browser of choice, click the address bar and enter the default IP address for your router. Different brands may use different default IP addresses. Some common brands are listed below. If your brand isn't listed here you can search for something like "[Brand Name] router's default IP address".
Default IP Addresses:
Asus - 192.168.1.1
Belkin - 192.168.2.1
Dell - 192.168.1.1
Motorola - 192.168.0.1
Linksys - 192.168.1.1
Netgear - 192.168.1.1 or 192.168.1.0
Example login page
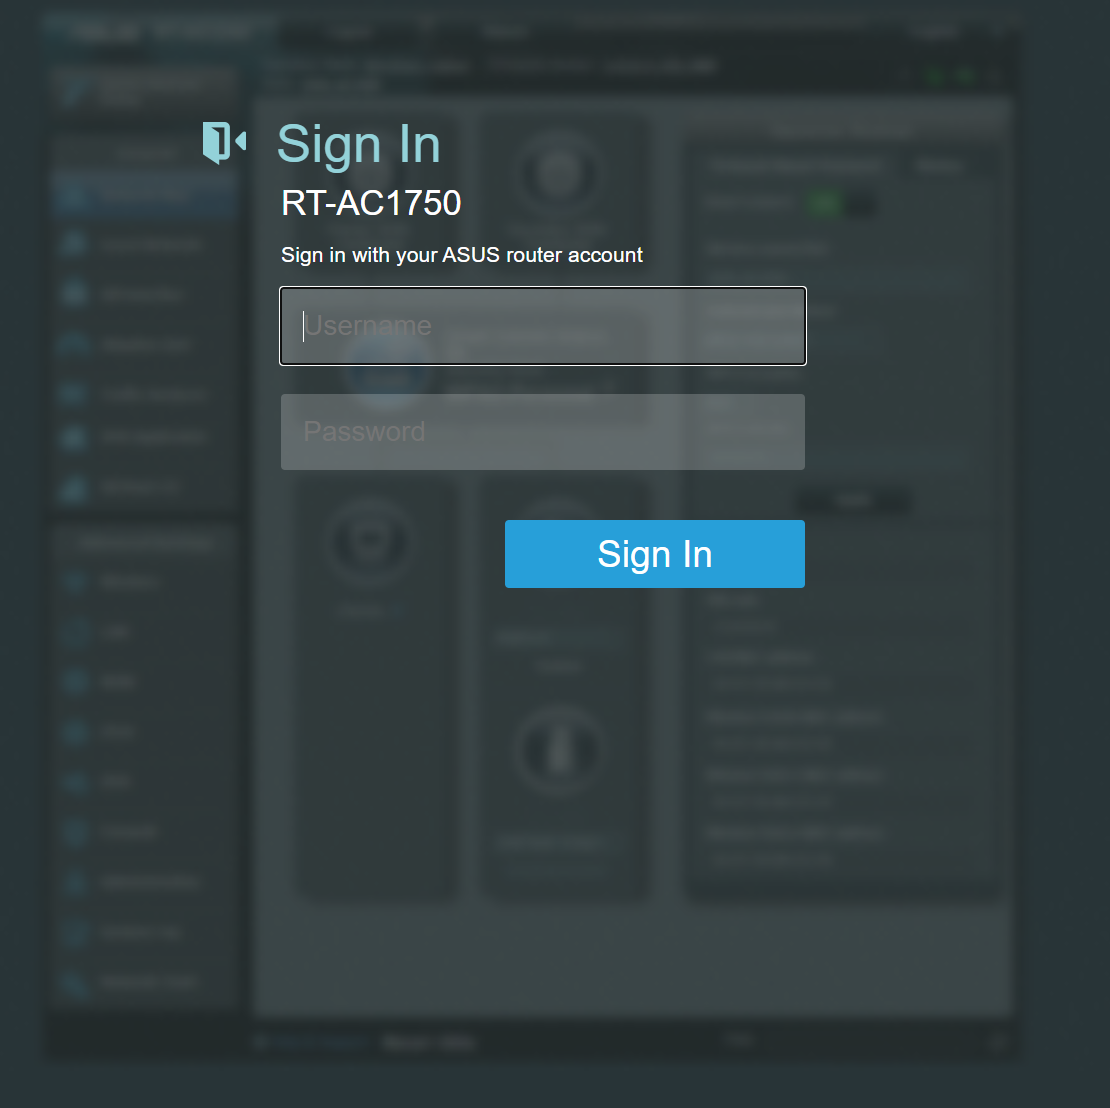
If the IP address does not bring you to a login page, you should check the manufacturer's website for help. If you do see a login page, then you're almost connected. If this is your first time logging into the router then much like the IP address, the router will have a default username and password. The default username and password can change depending on the brand. A common default username and password is admin/admin (enter admin for the username and admin for the password). If this doesn't work, check the manufacturer's website or run a search for something like "[Brand Name] router's default username and password". If you have successfully logged in, let's continue to router setup to start securing your network.
Router Setup
Here we list some good changes to make during the setup of your router. The steps and images shown will differ depending on the brand and firmware version of the router, but hopefully your router's interface is similar and you can use the images to help guide you through the process.
- Change username and password: this is the username and password used to log into the router interface we're currently using. For great advice on creating a strong password, check out this blog about password tips.
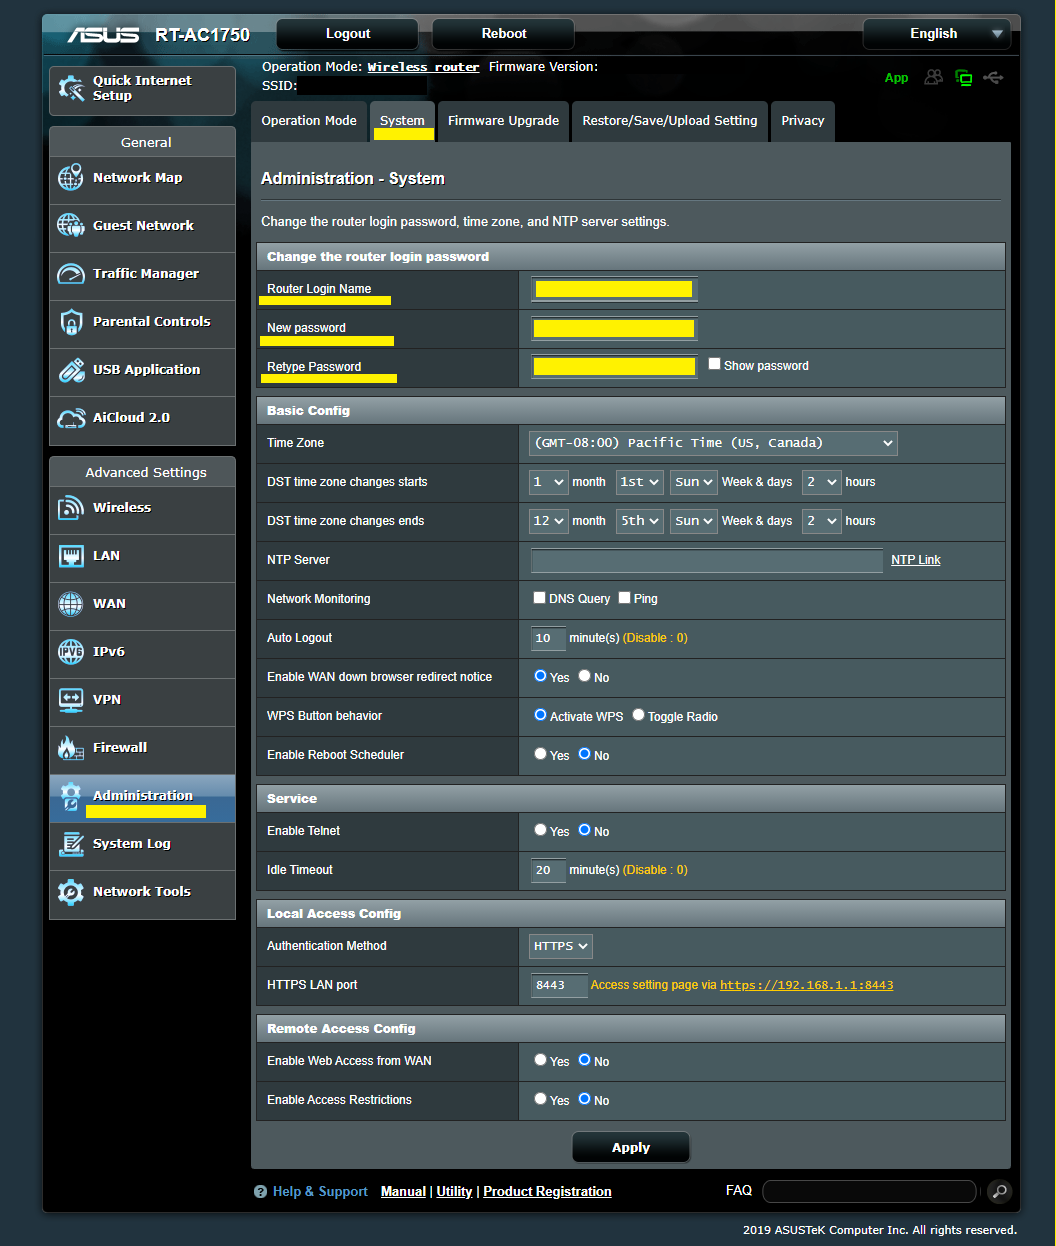
Select Administration on the left panel. Then select System in the top tabs. Then locate and change the Router Login Name (username) and create a new password. Lastly, click apply at the bottom.
- Change router administration authentication method to HTTPS.
WARNING: After making this change you will no longer access your router's interface with the same address. If before you accessed your router with '192.168.1.1' you will now have to navigate to 'https://192.168.1.1:8443'. The 8443 should be whatever port number you have chosen.
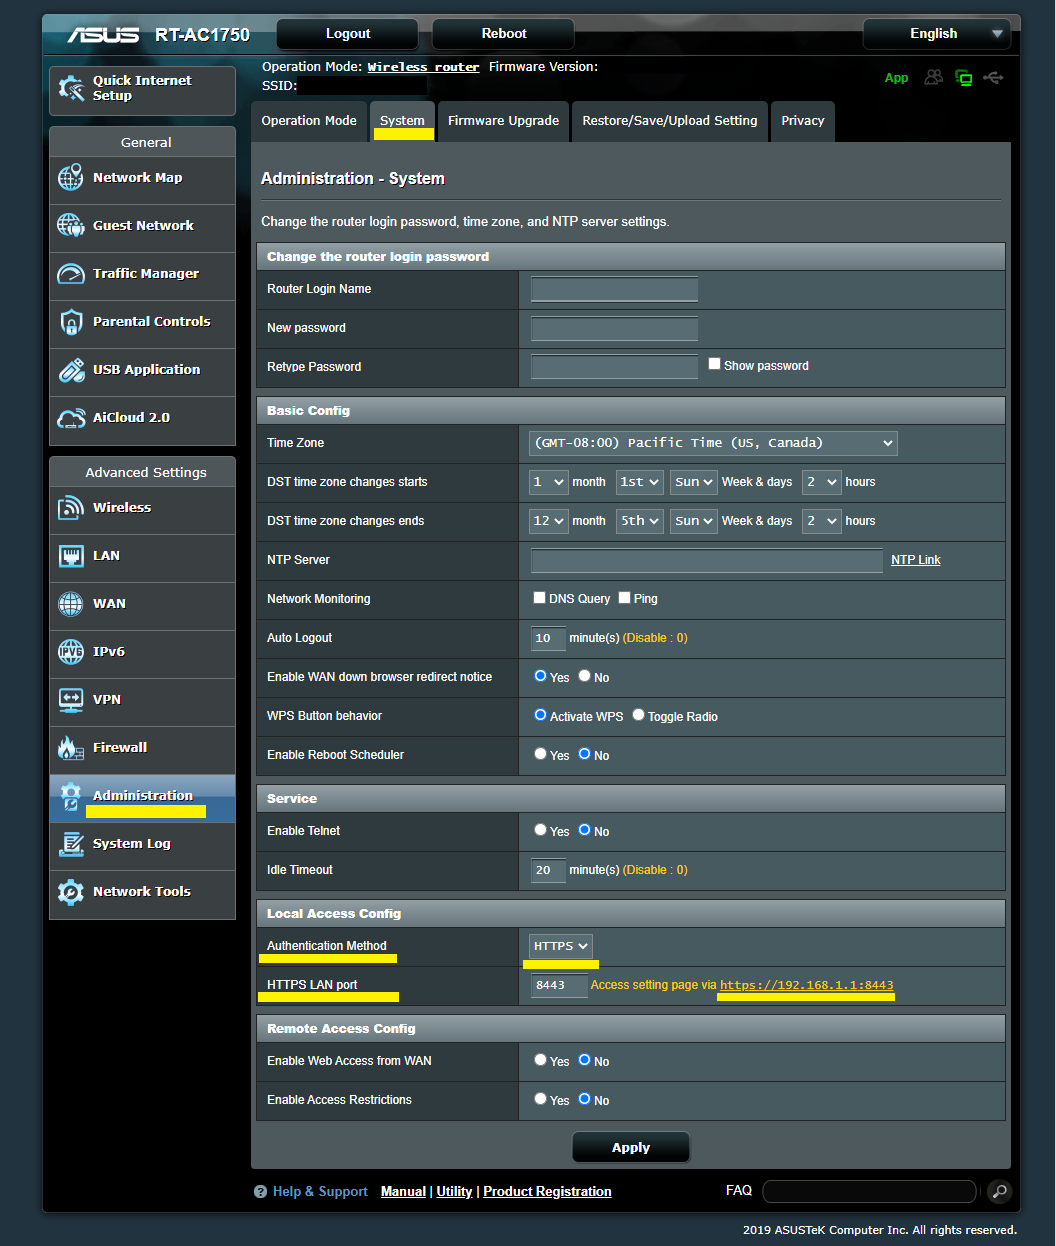
On the same Administration page where you changed your password, navigate to the bottom and locate Authentication Method. Use the drop down to change to HTTPS. You may also change the HTTPS LAN port or choose to leave it with whatever is default. Lastly, click Apply at the bottom.
- Disable Telnet.
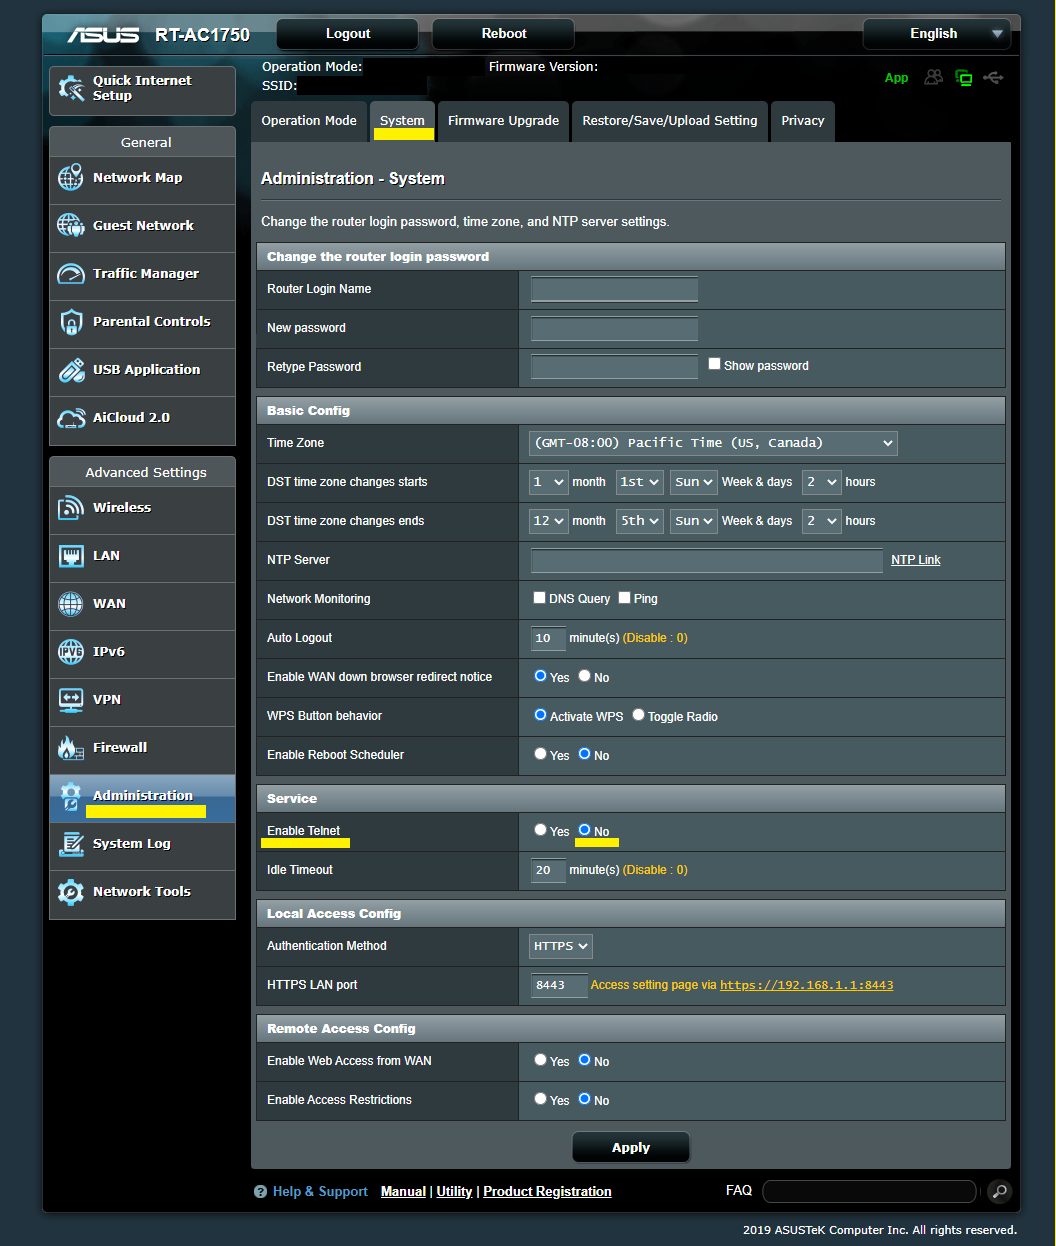
note: Telnet is used to connect to the router remotely. Telnet passwords are not encrypted and are transmitted in plain text.
Once again on the Administration page, this time locate "Enable Telnet". Next to it, select the "No" radio button. Lastly, click Apply at the bottom.
- Change wireless authentication method to WPA2 and encryption to AES.
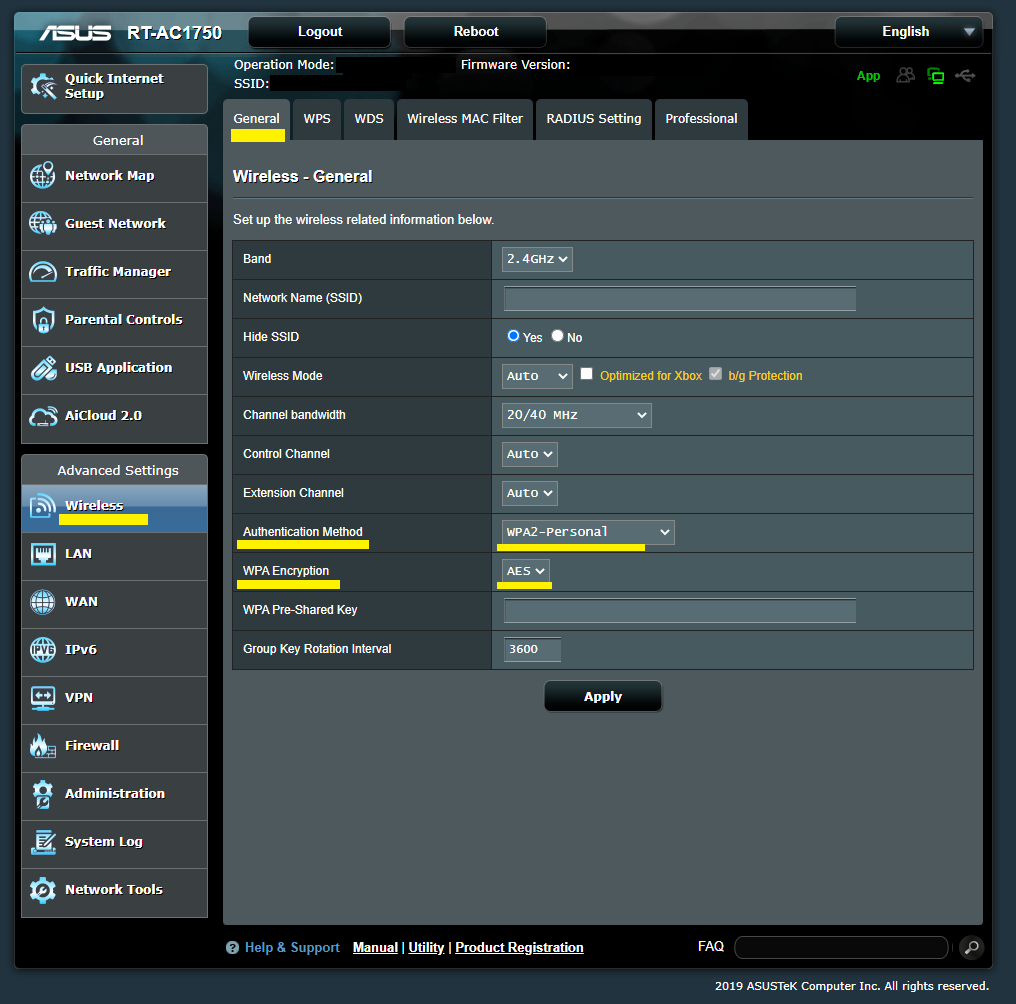
Select Wireless on the left panel. Check that you're in the General tab at the top. Then locate and change Authentication Method to WPA2. Just beneath Authentication method, locate WPA Encryption and change that to AES. Lastly, click Apply at the bottom.
- Hide SSID.
WARNING: After making this change your Wi-Fi may no longer appear in the Wi-Fi list on your devices. To connect to your Wi-Fi on your devices you may need to manually enter the SSID you have given your network. It's okay to make the decision not to do this step, as the ease of use is not worth making the change of no longer broadcasting your SSID.
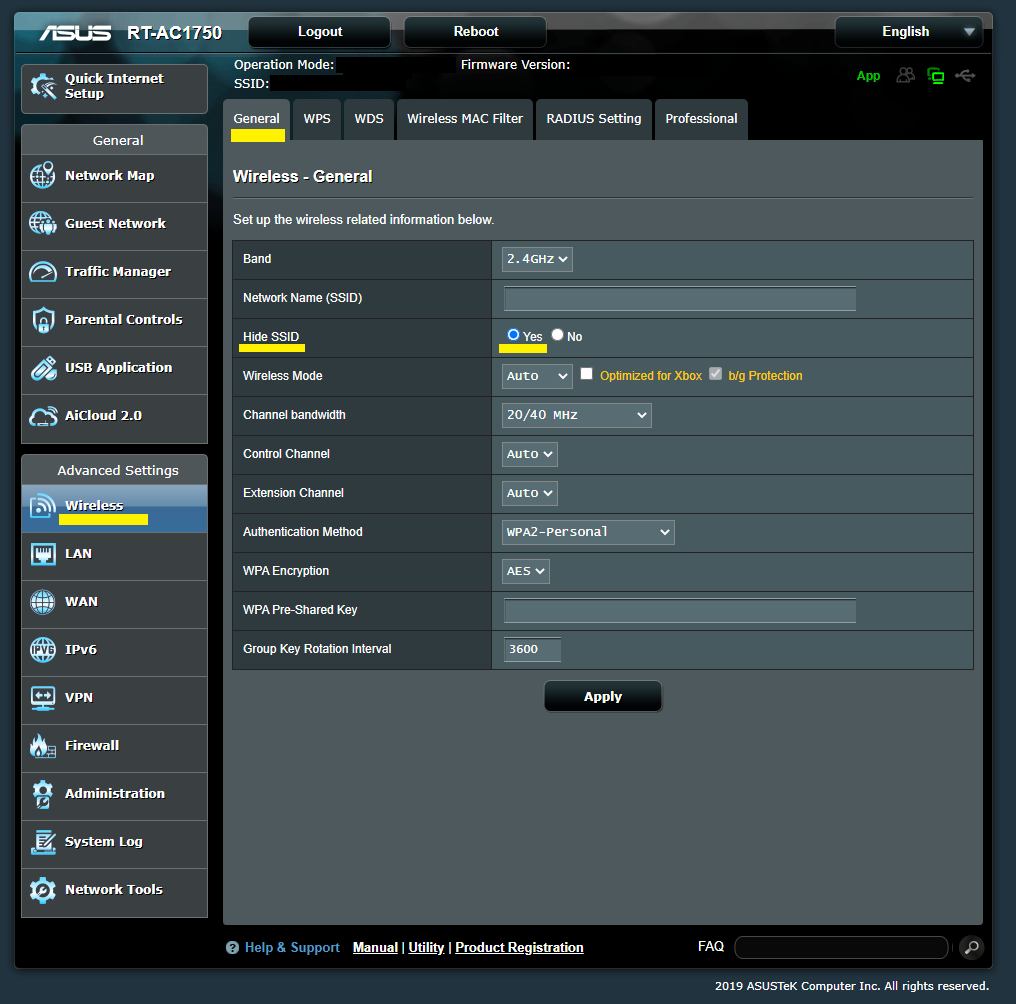
On the Wireless page again, select the "Yes" radio button next to Hide SSID. Lastly, click Apply at the bottom.
- Change the PSK (Pre-Shared Key) or Wi-Fi password.
note: This is setting the password that will be required go forward when connecting to your Wi-Fi.
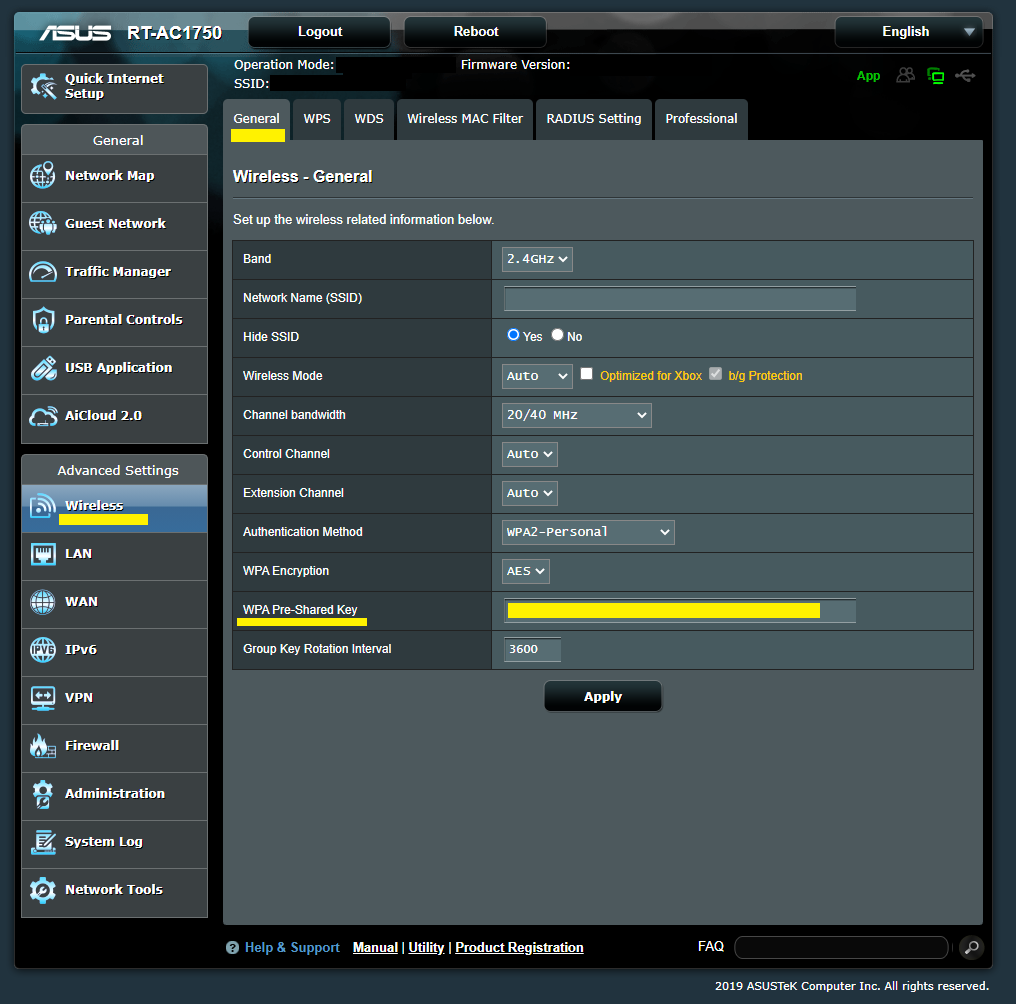
Once again on the Wireless page, but this time locate WPA Pre-Shared Key. In the space allotted, type the password you would like to use for your Wi-Fi. Lastly, click Apply at the bottom. For advice when deciding on a password check out this blog about password tips.
- Disable WPS.
note: WPS, when it's enabled, allows users to connect to the Wi-Fi network without knowing the password. Instead, they can join by pushing a button on the router.
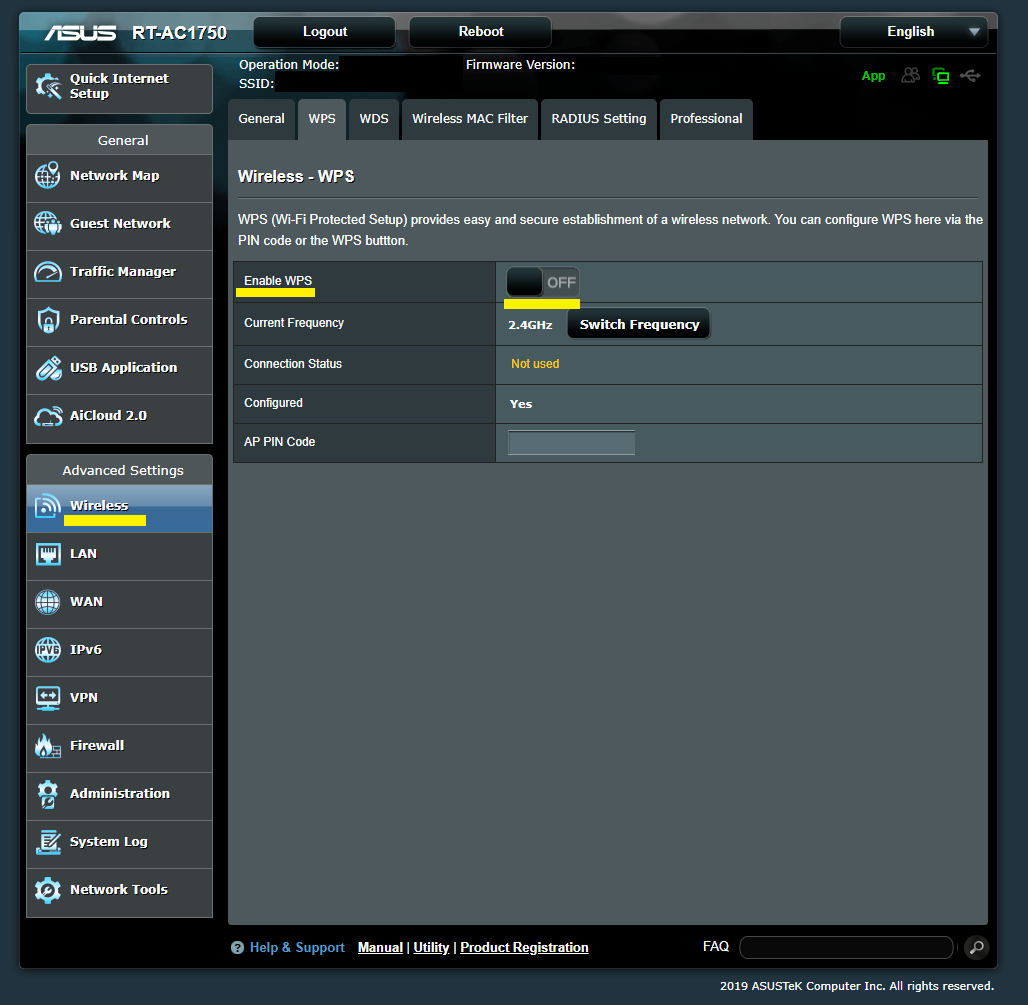
Select Wireless on the left panel. Then at the top select the WPS tab. Next to "Enable WPS" click to the toggle switch to the OFF position to disable the use of WPS (Wi-Fi Protected Setup).
- Enable the Firewall
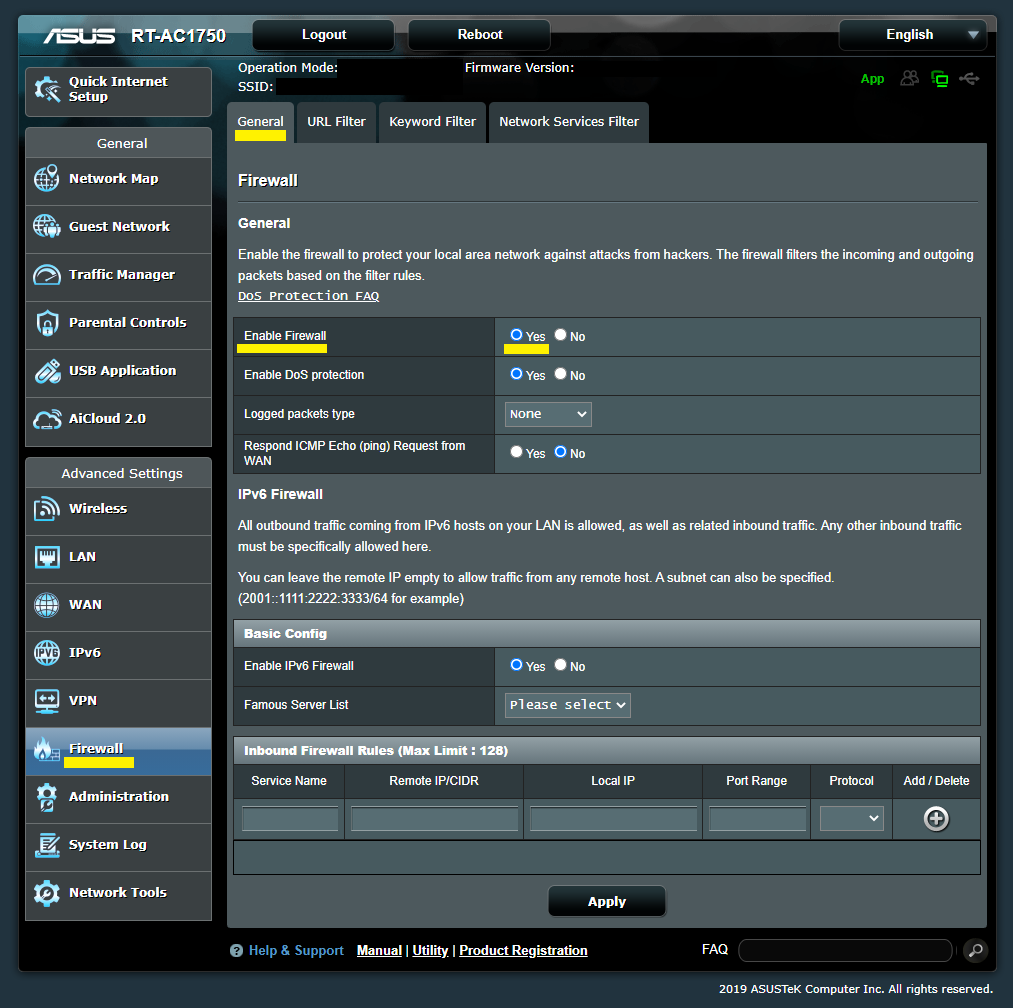
Select Firewall on the left panel. Then at the top, make sure the General tab is selected. Next to where it says "Enable Firewall", select the "Yes" radio button. Lastly, click Apply at the bottom.
- Disable port forwarding.
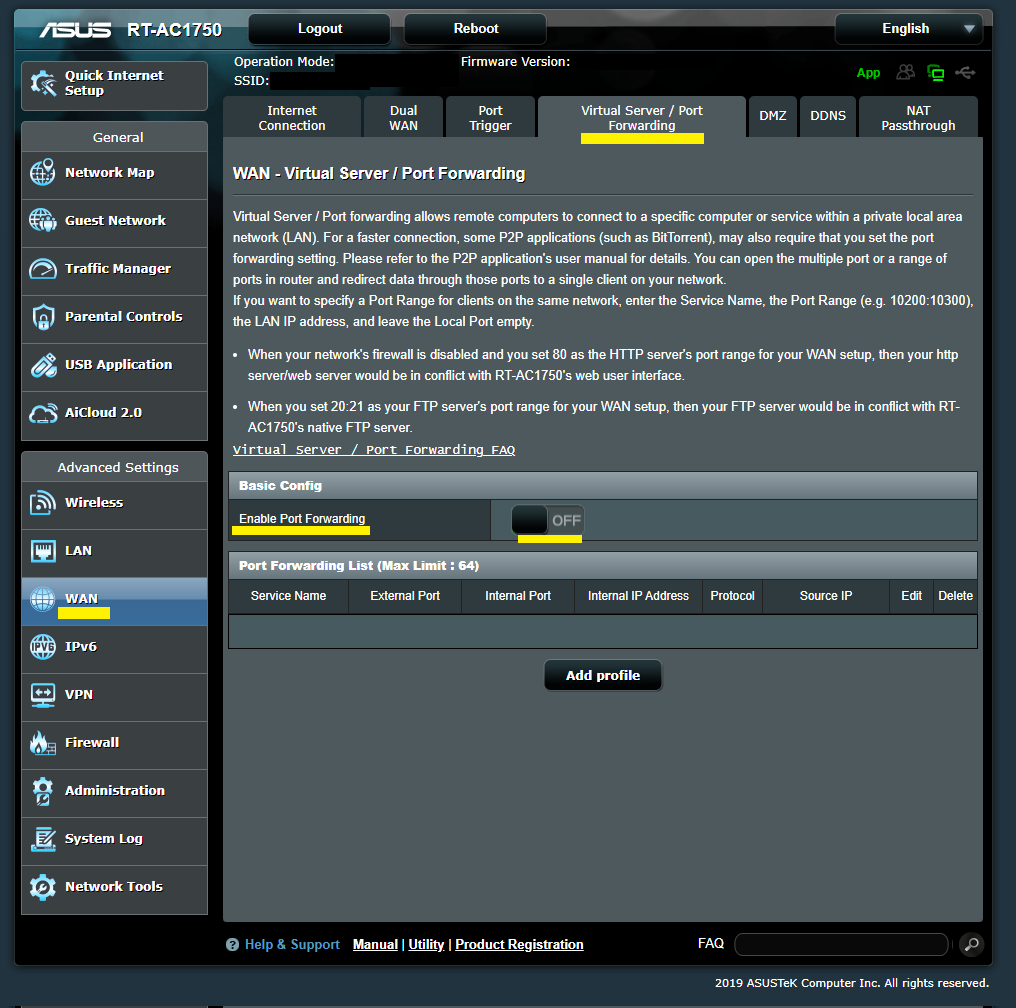
Select WAN on the left panel. Then at the top select the Virtual Server / Port Forwarding tab. Next to "Enable Port Forwarding" select the toggle switch to the OFF position to disable the feature.
- Upgrade firmware.
note: This is the last, but maybe the most important step. This is also the only step on the list that you will need to continue doing. Try to keep a schedule (once a month would be great) of continuing to check and upgrade your router's firmware.
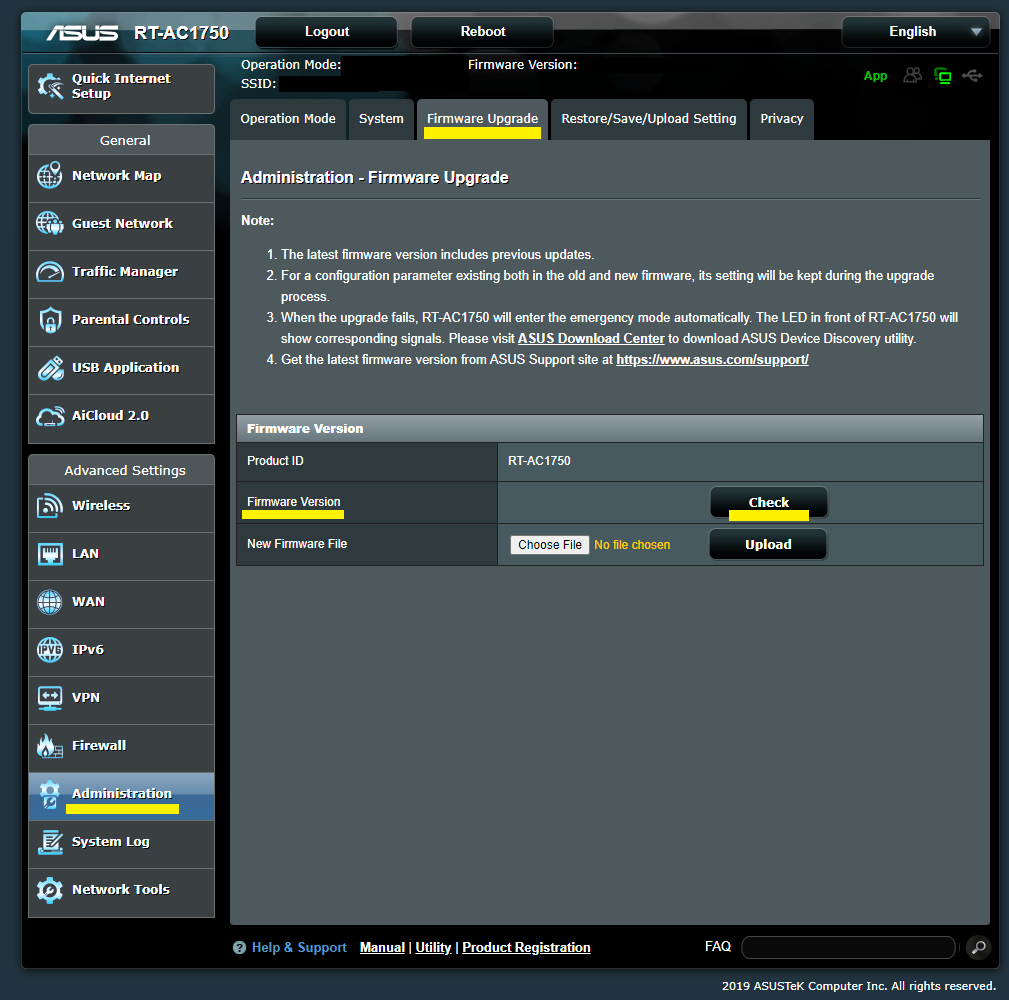
Navigate back to the Administration page by selecting Administration on the left panel. Then select the Firmware Upgrade tab at the top. Next to "Firmware Version" click the "Check" button. This will check to see if there is a newer firmware version than the one you have. If it finds a new version click the install button.
WARNING: Installing the new version will likely require your router to restart. You will temporarily lose internet access while your router reboots.
Hopefully, this quick article gave you the information you needed get your newly purchased router set up, improving your home network security.